


Seamster, Not Sewist.
- fabman556
- Jul 27, 2017
- 4 min read

Seersucker Suit Project, Part Three: the jacket begins!
With the Liberty of London and Silk Broadcloth shirts now completed, we move on to the main event in this extended project: the seersucker suit. As I have mentioned before, the jacket must be sewn before the pants, or I will begin wearing the pants and never get around to making the jacket.

I still can't believe I'm finally working up this fabric. A part of my stash since 1976 (that's 41 YEARS), it somehow seemed to be a permanent resident there. I would bring it out every spring and admire it, make a few plans, and then never get around to making it up.

The fabric has been pre-washed, making the finished suit washable (if necessary), and the pattern pieces then laid out on the fabric. The next step, after cutting out the jacket and pants, is to cut and apply the interfacing to the jacket. Having a strong aversion to any kind of hand sewing, I prefer to use fusible interfacing. Over many years of sharing techniques with customers over the cutting counter when I managed fabric stores, and also adapting many of the ideas and techniques from Easy Easier Easiest Tailoring by Pati Palmer and Susan Pletsch (a wonderful resource for anyone who is thinking about a tailoring project), I have figured out what works for me.

This book offers several perspectives and options, and is great for those who are beginners or are experienced, uh, people who sew.
OK...time for a little sidebar here. I almost typed in the word "sewers," a non-politically-correct word which we don't use anymore to refer to those who sew, because it's an alternative pronunciation of the term used for "an underground conduit for carrying off drainage water and waste matter." The word in current vogue is "sewist," which I find a bit pretentious. I am simply a "seamster."
Interfacing: Providing Shape and Support to the Garment
Taking my cues from those discussions with customers and from the tips in the Palmer/Pletsch tailoring book, I use fusible (iron-on) interfacing in layers to achieve the hand and body that I like in a suit jacket. It's quick and does the job. (And there's no hand sewing involved.)
As you might imagine, I also have an interfacing stash (gasp!) and have definite preferences for specific projects. Over the years there has been consolidation in the over-the-counter interfacing industry, so many of my favorites have disappeared or migrated to other manufacturers. (The term "over-the-counter" or "OTC" refers to products available to the home sewing market, i.e sold at the cutting counter.)
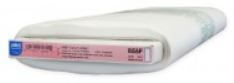
Most interfacings available today OTC are from Pellon, (www.pellonprojects.com) which is famous for their non-woven interfacings. There is a product called 855 Tailor's Elite which is a non-woven fusible interfacing, and I suspect that this is an evolution of an older fusible interfacing called Pel-Aire.
Another fusible interfacing, which is likely similar to my old favorite Armo-Weft, is a woven fusible from Pellon called 860 Ultra Weft.

I prefer using a woven interfacing instead of the non-woven...just my personal preference...but have used both types with success. If you can't find either of these at your local fabric store (tailoring is not a big business these days), both of these interfacings are available from several resources online, including fabric.com and Amazon.
If you'd rather use sew-in interfacing, and perform feats of magic with hand sewing tailoring techniques, those are covered in the Palmer/Pletsch book as well, and you have my undying admiration.
When your interfacing choice has been made, lay out the pattern pieces and cut them out. Assuming you've chosen a fusible, it's time to use your iron to apply the interfacing to the fabric using the manufacturer's instructions.
Tip: You'll definitely want to follow these instructions, which may vary according to the type of interfacing and the type of fashion fabric you're using. An unsuccessful application can impact the look and feel of the finished garment.

For a jacket, in addition to the front interfacing piece provided in the pattern, I like to add another piece to the lapel facing using the front interfacing pattern piece as a guide, with the interfacing grainline running parallel to the roll line. I also add another small piece to the corner of the lapel. (see below) These help give shape to the lapel and jacket front. Without any hand sewing, I might add.

This jacket pattern called for interfacing at the sleeve hems, and I also added some interfacing to the upper shoulder area of the jacket back, and to the hem on the jacket front and back, just for more structure and shaping. When you're the maker, you control the details.
After the interfacing has been applied to the jacket front, I stitch a piece of 1/4" twill tape along the roll line (to reinforce that fold in the finished jacket), using a machine basting stitch and stretching the tape just a bit as I sew. (Pattern instructions will tell you to do this by hand, but, well, you just know THAT'S not going to happen.) The machine basting stitches will not be readily visible under the folded-back lapel of the finished jacket.
The next step is making the welt pockets, and the instructions in this pattern are very complete and easy to follow. (I'm using Vogue 8890; Vogue and Burda have the best selection of menswear patterns on the market today.)

I haven't made welt pockets in a long time, and it requires accurate marking and a little precision (almost as boring as hand sewing), which slows me down a little, but they came out OK. Then the fronts and back are joined at the shoulders and the sides, the under collar is sewn on, and suddenly it's beginning to look like a jacket there on the hanger!

Much progress has been made on this suit, and I'm having a blast polishing up old skills and explaining the steps as I go. Still to come: sleeves/shoulder pads, lining and finishing. Stay tuned; I'll be wearing this suit before you know it! Until next time, keep those sewing machines humming!
DTFM


Comments